
Table of Contents
Introduction to Wood Framing
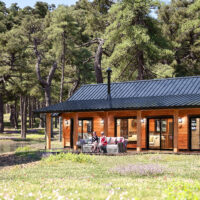
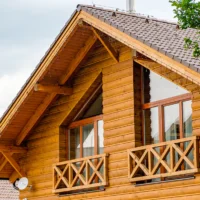
Wood framing details is one of the most fundamental aspects of residential and light commercial construction. It forms the skeleton of a building, providing structural support while allowing flexibility for insulation, electrical wiring, plumbing, and finishing materials. Understanding wood framing details is crucial not only for construction professionals but also for homeowners seeking durability and safety in their structures.
Proper framing ensures the building can withstand environmental stresses such as wind, snow, and seismic activity. Beyond basic structural stability, modern wood framing incorporates advanced techniques that promote energy efficiency, sustainability, and reduced material waste. From platform framing to post-and-beam methods, knowing the nuances of framing details is essential for achieving both quality and longevity in construction projects.
What are wood framing details?
Wood framing details include the specific methods, measurements, and materials used to assemble a building’s structural framework, covering walls, floors, and roofs. These details ensure proper load distribution, structural integrity, and compliance with building codes.
Basics of Wood Framing Construction
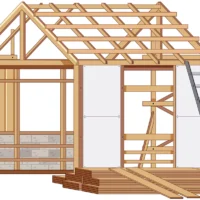
Components of a Wood Frame
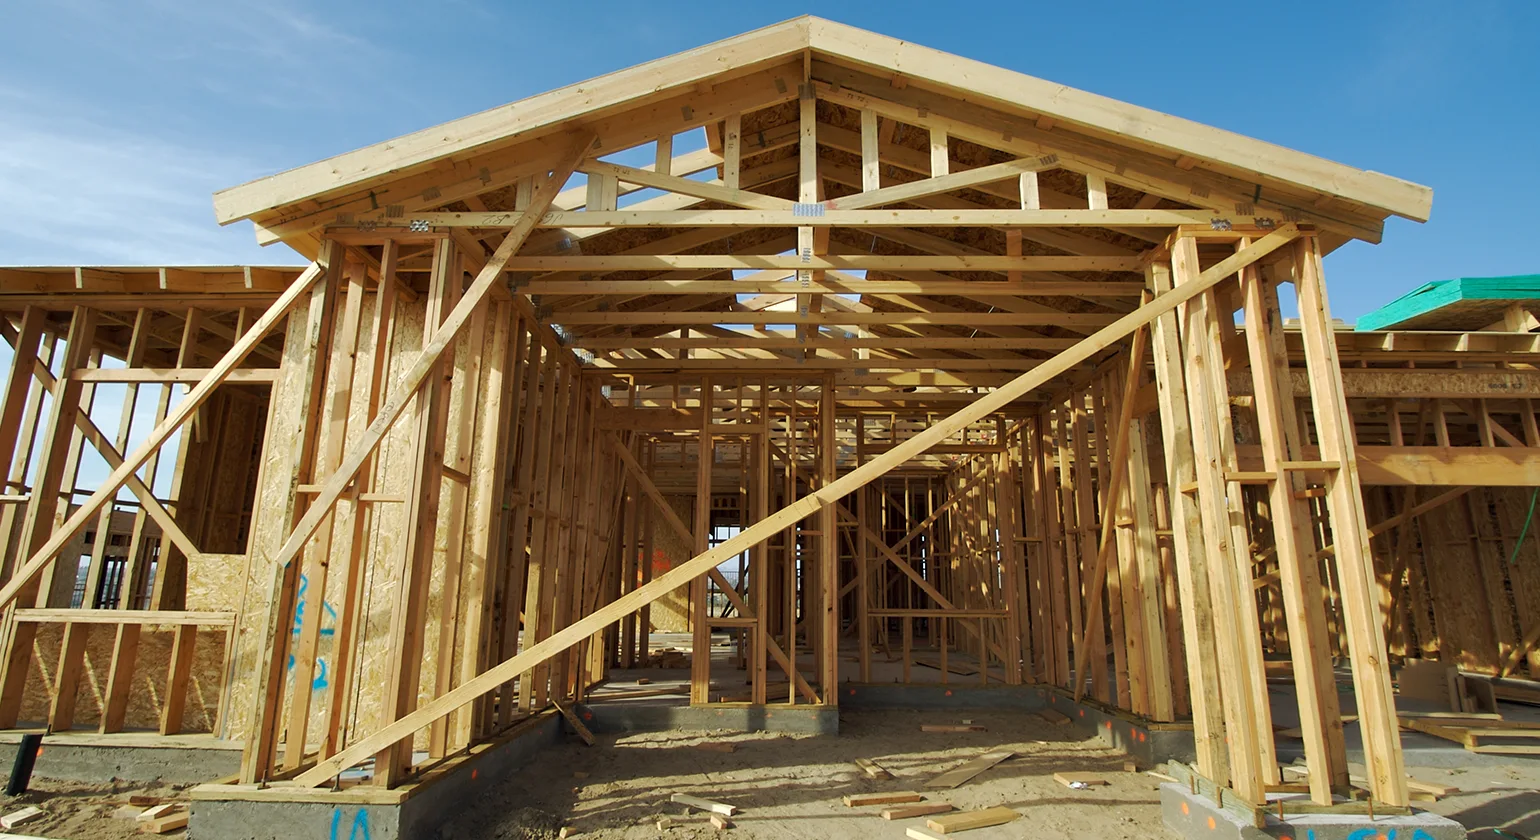
A typical wood-framed building consists of several primary components:
- Studs: Vertical members that form the walls. They are typically spaced 16 or 24 inches apart and carry both vertical and lateral loads.
- Plates: Horizontal members at the top and bottom of walls, known as the top plate and bottom plate, which hold the studs in place.
- Joists: Horizontal framing members that support floors and ceilings. Proper joist spacing ensures structural integrity and prevents sagging.
- Rafters: Sloped framing members that form the roof structure, transferring loads to walls or beams.
Overview of Standard Framing Methods
There are three widely used framing methods:
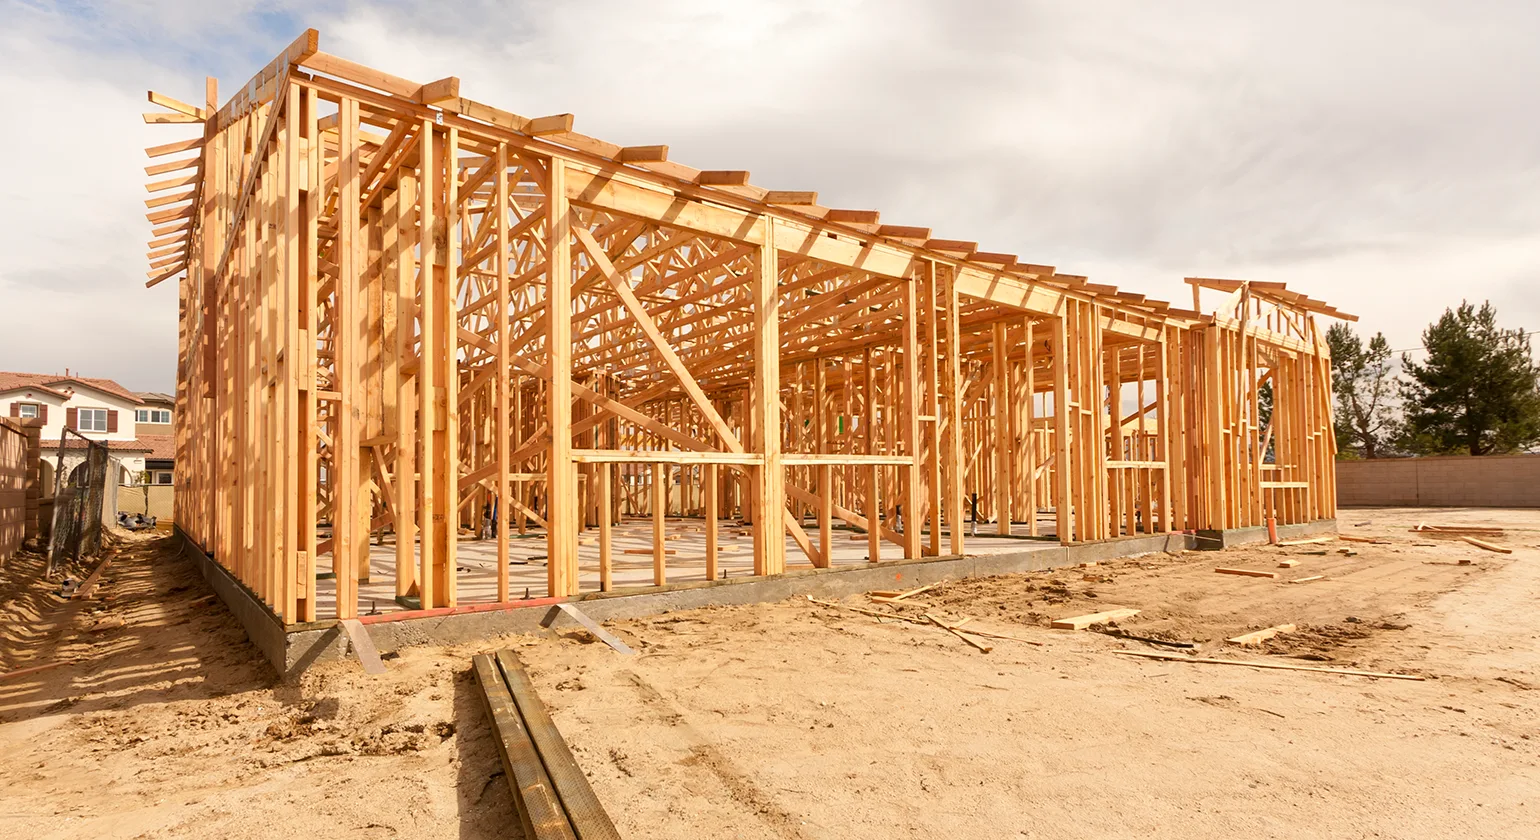
- Platform Framing: The most common technique in modern residential construction. Walls are built one story at a time, creating a platform for the next floor. It provides safety during construction and reduces the risk of vertical collapse.
- Balloon Framing: An older method where wall studs extend continuously from the foundation to the roofline. Though less common today, it allows for fewer horizontal seams and can create taller, uninterrupted walls.
- Post-and-Beam Framing: Uses larger timbers or posts instead of closely spaced studs. This method offers an open floor plan and often a visually appealing exposed timber look.
Wood Species Commonly Used for Framing
The choice of wood affects strength, durability, and ease of construction. Common species include:
- Douglas Fir: Known for its strength and stiffness, ideal for load-bearing studs and joists.
- Southern Yellow Pine: Widely used in the United States for floor joists and wall studs.
- Spruce-Pine-Fir (SPF): A lightweight option that is easy to handle and cost-effective for framing projects.
Standard Wood Framing Details

Understanding standard wood framing details is critical for constructing walls, floors, and roofs that are both safe and durable.
Wall Framing Details
Wall framing serves as the primary vertical support system of a building. Key elements include:
- Top Plate: The horizontal member at the top of a wall. It locks the studs in place and provides a surface for ceiling joists or roof rafters. Double top plates are common in load-bearing walls for added stability.
- Bottom Plate (Sole Plate): The horizontal member at the base of the wall, anchored to the floor structure. It transfers loads from studs to the foundation or floor system.
- Corner Framing: Corners require additional studs, known as jack studs or cripple studs, to provide structural support and nailing surfaces for interior and exterior finishes. Proper corner framing ensures walls remain plumb and can bear loads efficiently.
- Openings for Doors and Windows: Headers, king studs, and trimmers are installed around openings to transfer loads and maintain wall integrity.
Floor Framing Details
Floors are supported by a network of joists, bridging, and blocking:
- Joist Spacing: Typically, 16 or 24 inches on center, joist spacing is critical for preventing sagging and supporting anticipated loads.
- Bridging: Horizontal members between joists improve stability and distribute weight evenly.
- Blocking: Short, solid pieces of lumber inserted between joists at regular intervals to prevent twisting and provide additional support for subfloor materials.
- Subflooring: Plywood or oriented strand board (OSB) sheets are installed over the joists, providing a solid base for flooring finishes.
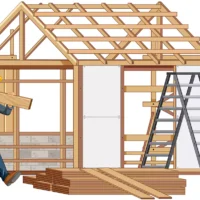
Roof Framing Details
The roof framing protects the building from weather and provides structural stability. Key components include:
- Rafters: Sloped beams that carry roof loads to walls or beams. Their spacing and size are designed based on roof pitch, snow load, and span length.
- Ridge Beam: The horizontal member at the peak of the roof that supports opposing rafters and helps maintain roof shape.
- Trusses: Pre-engineered assemblies of wood and metal connectors that provide strength and simplify roof construction. Trusses are increasingly popular due to reduced labor costs and faster installation.
- Sheathing: OSB or plywood panels attached to rafters or trusses, providing a base for roofing materials and additional structural rigidity.
Wood Deck Framing Details
Decks are an extension of living spaces and require careful structural planning to ensure safety, durability, and compliance with building codes. Understanding wood deck framing details is essential for both contractors and DIY builders.
Ledger Board Attachment & Flashing Details
The ledger board is the horizontal member attached to the house that supports the deck. Proper installation is critical to prevent structural failure and water damage. Key points include:
- Ledger Attachment: Secure the ledger board to the house rim joist using lag bolts or structural screws. Avoid using nails alone, as they may loosen over time.
- Flashing: Install metal flashing above the ledger board to divert water away from the house. Proper flashing prevents rot and extends the lifespan of both the deck and the home’s exterior wall.
Joist Sizing, Spacing, and Blocking
Deck joists form the framework that supports the decking boards. Proper sizing and spacing are essential for load-bearing capacity and stability:
- Joist Sizing: Typical joist dimensions are 2×6, 2×8, or 2×10, depending on the deck span and load requirements.
- Spacing: Joists are commonly spaced 16” on center for standard decks. For certain materials like composite decking, 12” or 16” spacing may be required.
- Blocking: Install short blocks between joists to prevent twisting and improve load distribution, particularly in longer spans.
Beam and Post Connections
Beams support joists and transfer loads to posts. Proper connections ensure structural integrity:
- Beam Attachment: Beams can be either flush-mounted or hung using joist hangers. The choice depends on aesthetic preference and load requirements.
- Posts: Secure posts to footings using metal post anchors. Ensure posts are plumb and adequately braced to resist lateral forces.
- Post-to-Beam Fastening: Use carriage bolts or structural screws for a secure connection that allows load transfer without compromising stability.
Deck Stair Framing Details
Stairs are often the most complex component of a deck:
- Stringers: Typically, 2×12 boards cut to the proper rise and run. Spacing should match deck code requirements for load support.
- Treads & Risers: Use pressure-treated lumber or durable composite materials. Ensure consistent dimensions to prevent trip hazards.
- Railings: Securely fastened to stringers or posts to meet safety codes.
Table of Common Span Recommendations
Joist Size | Max Span (ft) | Beam Size | Max Span (ft) | Post Spacing (ft) |
2×6 | 9 | 2×8 | 6 | 6 |
2×8 | 11 | 2×10 | 8 | 8 |
2×10 | 14 | 2×12 | 10 | 10 |
Advanced Framing Techniques

Advanced framing, also known as Optimum Value Engineering (OVE), optimizes lumber use while maintaining structural integrity. It’s increasingly popular for energy-efficient, sustainable construction.
What Is Advanced Framing?
Advanced framing reduces unnecessary material usage and improves energy efficiency without compromising strength. It focuses on careful spacing, alignment, and insulation to create cost-effective, high-performance structures.
Is advanced framing stronger?
Yes, when properly engineered, advanced framing can be as strong as traditional methods while improving energy efficiency and reducing material costs. It relies on precise load paths, structural calculations, and modern design principles.
Benefits of Advanced Framing
- Reduced Lumber Use: Fewer studs and headers decrease material costs.
- Improved Energy Efficiency: Wider stud spacing allows for more insulation, reducing thermal bridging and improving wall performance.
- Faster Construction: Less cutting, fewer components, and simplified layout speed up construction timelines.
Techniques for Advanced Framing
- 2×6 Studs @ 24” On Center: Standard studs spaced farther apart without losing structural integrity.
- Single Top Plates: Instead of double top plates, load-bearing calculations allow single plates in combination with careful alignment of studs.
- Insulated Headers: Headers over doors and windows can be designed to minimize lumber while accommodating insulation needs.
Cost Savings & Structural Integrity
By implementing OVE techniques, builders can reduce construction costs by 10–20% while maintaining safety and durability. Key considerations include proper load transfer, accurate calculations, and adherence to building codes.
Connection & Fastening Details

Proper connections and fasteners are critical to the stability of a wood-framed structure. Incorrect fastening can compromise both safety and longevity.
Types of Nails, Screws, and Metal Connectors
- Nails: Commonly used for framing; ring-shank nails provide better holding power than smooth-shank nails.
- Screws: Structural screws are increasingly preferred for their superior holding power and ease of installation.
- Metal Connectors: Joist hangers, hurricane ties, and post anchors help transfer loads and resist lateral forces, especially in high-wind or seismic regions.
Proper Nailing Patterns & Spacing
- Stud-to-Plate Connections: Use at least two nails per stud end, driven through the face of the plate.
- Joist-to-Beam Connections: Joist hangers require nails or screws at specified spacing to maintain strength.
- Shear Walls: Nailing patterns are critical for shear walls to resist lateral forces; staggered nailing and proper spacing ensure structural performance.
Shear Wall & Load Transfer Considerations
- Shear Walls: Transfer lateral loads from wind or seismic activity to the foundation. Proper nailing, blocking, and material selection are crucial.
- Load Paths: Ensure continuous transfer of weight from the roof to the foundation. Every connection—from rafters to joists, studs to plates, and beams to posts—must be engineered to handle anticipated loads.
Implementing proper connection and fastening details prevents failures such as wall bowing, joist sagging, or deck collapse, ensuring long-term safety and stability.
Common Mistakes & How to Avoid Them
Even experienced builders can make errors during wood framing, which may compromise structural integrity, safety, or energy efficiency. Understanding common framing mistakes and how to avoid them is essential for quality construction.
Misaligned Studs and Joists
- Problem: Misaligned studs and joists can lead to uneven walls, sagging floors, and difficulty installing drywall or finishes.
- Solution: Always measure and mark accurately before installation. Use a laser level or string line to ensure alignment along the entire wall or floor span. Verify spacing according to building codes—typically 16” or 24” on center for studs and joists.
Inadequate Bracing and Load Path Issues
- Problem: Missing bracing or improper load paths can weaken the structure, leading to wall bowing, roof sagging, or even collapse under heavy loads.
- Solution: Install diagonal bracing, blocking, and metal connectors where required. Ensure that the load from the roof transfers correctly through walls, beams, and posts down to the foundation. Regularly review plans to verify all load-bearing paths are continuous and properly supported.
Poor Moisture Control
- Problem: Moisture can cause wood rot, warping, and mold, reducing the lifespan of the structure. Decks, roofs, and walls are particularly vulnerable.
- Solution: Use pressure-treated lumber or rot-resistant species for exposed areas. Install flash, moisture barriers, and proper drainage systems. Maintain adequate ventilation in enclosed spaces to prevent condensation buildup.
Safety Hazards During Framing
- Problem: Framing involves heavy lumber, power tools, and elevated work surfaces. Improper safety practices can result in accidents.
- Solution: Always use personal protective equipment (PPE), secure temporary supports, and follow safety protocols for ladders and scaffolding. Train workers in proper handling of tools and materials.
What are common framing mistakes?
Common framing mistakes include misaligned studs, inadequate bracing, poor moisture control, and safety oversights, all of which can compromise structural integrity.
Wood Framing for Energy Efficiency
Modern building standards increasingly emphasize energy-efficient construction. Wood framing plays a crucial role in reducing energy consumption and enhancing thermal performance.
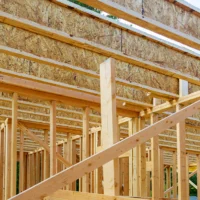
Air Sealing and Insulation Strategies
- Air Sealing: Prevents drafts and reduces heat loss. Use caulk, spray foam, and weather-stripping around framing connections, windows, and doors. Proper air sealing improves HVAC efficiency and comfort.
- Insulation: Fiberglass batts, mineral wool, or spray foam can be installed between studs and joists. Ensure insulation is continuous and avoids gaps around headers, corners, and floor joists.
Advanced Framing for Thermal Bridging Reduction
Advanced framing structures reduce thermal bridging by using techniques such as:
- 24” On-Center Stud Spacing: Fewer studs mean less wood to conduct heat from interior to exterior.
- Insulated Headers: Over doors and windows, insulated headers reduce heat loss compared to solid lumber.
- Single Top Plates: Simplifies framing while allowing more space for insulation.
These techniques not only save materials but also enhance energy performance, making homes more sustainable and cost-effective over time.
Best Practices for Net-Zero or High-Performance Homes
- Combine advanced framing with continuous exterior insulation and high-performance windows.
- Ensure tight air sealing and proper ventilation systems to maintain indoor air quality.
- Use energy modeling to optimize framing layout and insulation thickness.
By integrating these strategies, builders can construct net-zero or high-performance homes that meet or exceed modern energy standards.
Code Requirements & Compliance

Wood framing must comply with building codes to ensure safety, structural integrity, and legal approval. Understanding both international and local requirements is essential.
International Residential Code (IRC) for Wood Framing
The IRC provides the minimum standards for residential wood framing in the United States:
- Stud and Joist Spacing: IRC specifies allowable spans and spacing for different wood species and sizes.
- Load Requirements: Includes live load (people, furniture), dead load (structural weight), wind load, and snow load specifications.
- Fasteners and Connectors: Defines acceptable nails, screws, metal connectors, and fastening patterns.
- Shear Walls: Provides guidelines for lateral force resistance, including nailing patterns and wall bracing.
Local Building Codes & Permit Requirements
- Local jurisdictions may impose stricter regulations than IRC, particularly for seismic, flood, or hurricane-prone areas.
- Before construction, obtain necessary permits and submit framing plans for review. Compliance ensures inspections pass and avoids costly legal issues.
Fire-Resistance and Structural Load Considerations
- Fire-Rated Assemblies: In certain areas, IRC and local codes require fire-resistant materials or assemblies in walls, ceilings, and roofs.
- Structural Load Compliance: Verify that all framing components, including studs, joists, and beams, meet load-bearing requirements. Load paths must be continuous from roof to foundation.
What code governs wood framing?
Wood framing is primarily governed by the International Residential Code (IRC), with additional local building codes and permit requirements applicable depending on location. Compliance ensures safety, durability, and legal construction practices.
Tools & Resources

Successful wood framing requires the right tools, materials, and resources. Proper preparation ensures accuracy, efficiency, and safety on the job site.
Essential Tools for Framing
- Saws: Circular saws and miter saws are essential for cutting studs, joists, and rafters to precise lengths. A table saw can also help with more complex cuts.
- Nailers & Hammers: Pneumatic nailers speed up framing work, while hammers are necessary for manual adjustments. Ring-shank nails provide better holding power for structural connections.
- Levels & Measuring Tools: Laser levels, spirit levels, and tape measures ensure accurate alignment of studs, plates, and joists. Proper leveling prevents misaligned walls, sagging floors, and structural issues.
- Squares & Layout Tools: Speed squares and framing squares are crucial for marking cuts, verifying right angles, and laying out rafters or stair stringers.
Recommended Framing Hardware and Connectors
- Joist Hangers: Provide a strong connection between joists and beams, maintaining proper alignment and load transfer.
- Hurricane Ties & Straps: Enhance structural resistance to wind or seismic forces by securing rafters and trusses to top plates and beams.
- Post Anchors: Elevate and secure posts to concrete footings, protecting wood from ground moisture and ensuring stability.
- Structural Screws & Bolts: Offer superior holding power compared to nails, especially for critical load-bearing connections.
Free Downloadable Checklist for Wood Framing Inspection
To ensure quality and compliance, a wood framing inspection checklist can help builders and homeowners verify that all structural components meet code and safety requirements. Key items to include:
- Stud, plate, and joist alignment and spacing
- Proper nailing and fastening patterns
- Beam and post connections
- Ledger board and flashing installation for decks
- Shear wall bracing and lateral load considerations
- Moisture protection and ventilation
This checklist streamlines inspections, reduces errors, and ensures that wood framing construction details meet both IRC and local code requirements.
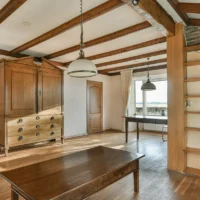
Conclusion
Understanding wood framing details ensures safe, durable, and energy-efficient structures. Proper alignment of studs, joists, and rafters, along with correct wood deck framing details, advanced framing techniques, moisture control, and code compliance, creates strong, long-lasting homes and decks. Using the right tools, connectors, and inspection practices prevents common mistakes and supports high-performance, sustainable construction.
Know More>>> Tips and Guide for Choosing the Perfect Wooden House Plans
FAQ'S
1. What is the typical cost of wood framing per square foot?
The cost of wood framing typically ranges from $8 to $15 per square foot, depending on wood species, labor rates, and project complexity.
2. Is wood framing better than steel framing?
Wood framing is cost-effective, easy to work with, and provides natural insulation, while steel framing is stronger, fire-resistant, and more durable in extreme conditions. The choice depends on budget, climate, and design requirements.
3. Can wood framing be used in hurricane or tornado zones?
Yes, wood framing can be used in high-wind areas if engineered properly, using hurricane ties, metal connectors, and reinforced bracing to comply with local building codes.
4. What are the most common wood species used for framing?
Douglas Fir, Southern Yellow Pine, and Spruce-Pine-Fir (SPF) are commonly used due to their strength, availability, and cost-effectiveness.
5. How long does a typical wood-framed house last?
With proper construction, maintenance, and moisture control, a wood-framed home can last 50–100 years or more.
6. What are the key differences between platform and balloon framing?
Platform framing builds one story at a time and is common today, while balloon framing uses continuous studs from foundation to roof, allowing taller uninterrupted walls but requiring more labor and material.
7. How can advanced framing techniques improve energy efficiency?
Advanced framing, or Optimum Value Engineering (OVE), reduces lumber use, increases insulation space, and minimizes thermal bridging, resulting in lower energy costs and improved home performance.