
Table of Contents
Introduction to Timber Frame Tools
Timber framing is a traditional method of building using large, heavy timbers joined together with precision joinery. Unlike standard framing, it relies heavily on expertly crafted joints rather than nails or screws. To achieve this craftsmanship, you need the right timber frame tools. These tools—both hand-powered and electric—are specially designed to handle large wood dimensions and intricate joinery, making them indispensable for any timber framing project.
What is Timber Framing?
Timber framing involves crafting joints like mortise and tenon, dovetails, and scarf joints into heavy timber. It emphasizes strength, longevity, and aesthetic beauty. This building technique dates back centuries and is still valued today for its rustic charm and structural integrity.
Why Specialized Tools Matter in Timber Framing
Using general carpentry tools won’t suffice in timber framing. Timber frame tools are purpose-built to handle the scale and precision of these projects. From heavy-duty chisels to specialized saws, each tool plays a crucial role in maintaining accuracy, reducing waste, and ensuring safety.
Essential Hand Tools for Timber Framing

While power tools offer speed, hand tools give timber framers the ability to make fine adjustments and create traditional joints with high precision.
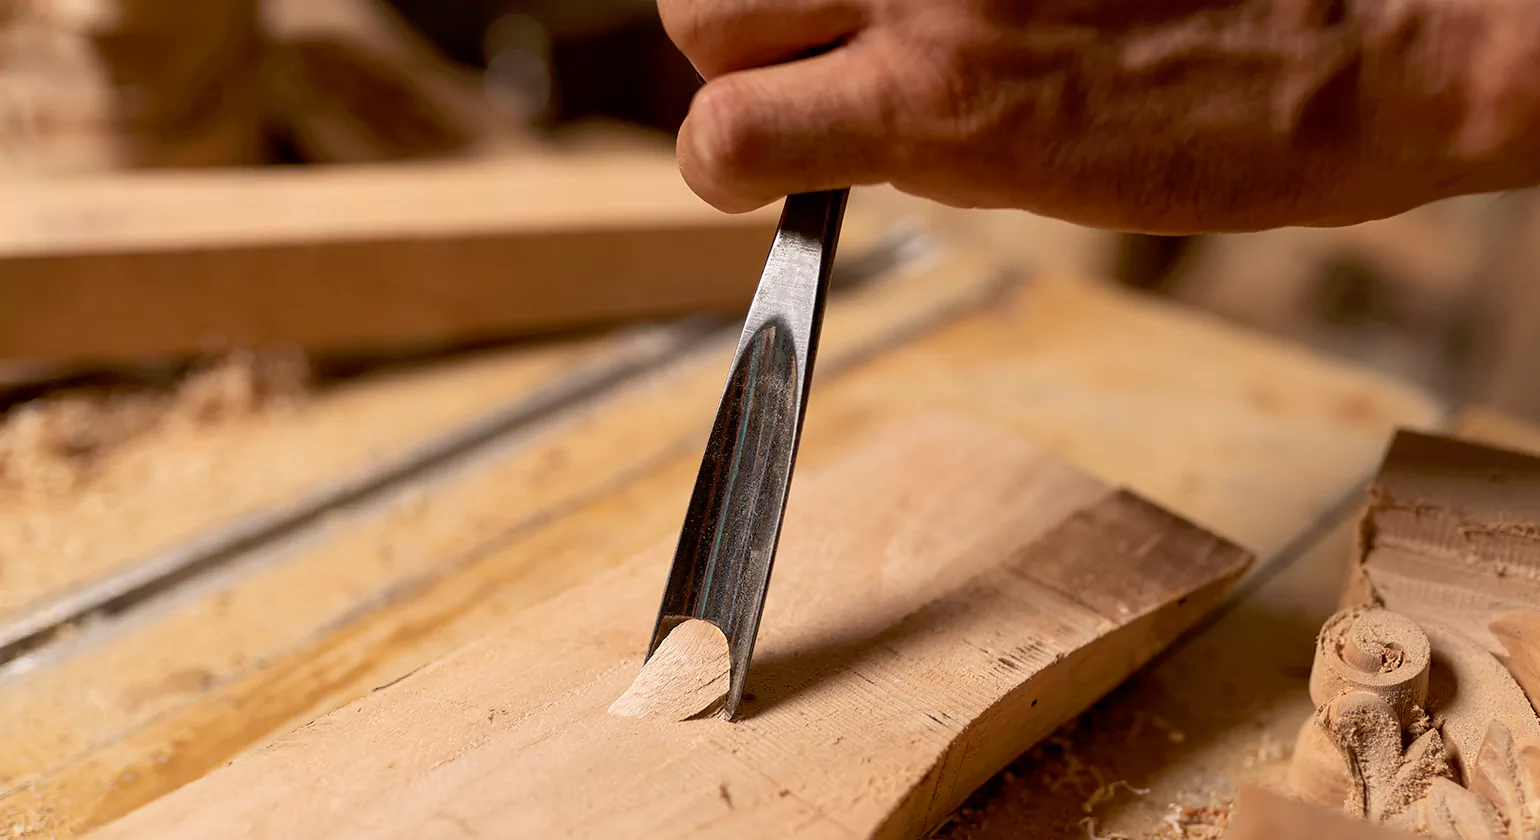
Framing Chisels
Framing chisels are fundamental timber frame tools used to shape mortises and refine joints.
Types and Sizes of Timber Chisels
Timber chisels typically come in sizes ranging from 1 inch to 2 inches or more in width. They are longer and heavier than standard chisels to withstand mallet strikes and deep timber cuts.
How to Choose a Good Framing Chisel
When selecting a framing chisel, look for high-carbon steel construction, a solid tang or socket handle, and a comfortable grip. Brands like Barr, Narex, and Sorby are popular among timber framers.
Timber Framing Slicks
Slicks resemble oversized chisels and are used for smoothing and paring joints.
Differences Between Slicks and Chisels
While chisels are used with a mallet, slicks are operated by hand pressure. Their wide blades and long handles allow for better leverage and precision in finishing joints.
Techniques for Smoothing and Finishing Joints
Hold the slick with both hands and apply steady pressure to pare away thin shavings, refining the timber surface without gouging or tearing.
Mallets for Timber Framing
Mallets are essential for driving chisels and other striking tools.
Wooden vs. Rubber Mallets
Wooden mallets are preferred for framing chisels due to their balance and shock absorption. Rubber mallets may be used for tapping joints into place without marring the timber.
Proper Usage Tips
Always strike the chisel tang with a square, controlled motion. Avoid overstriking, which can damage the handle or reduce control.
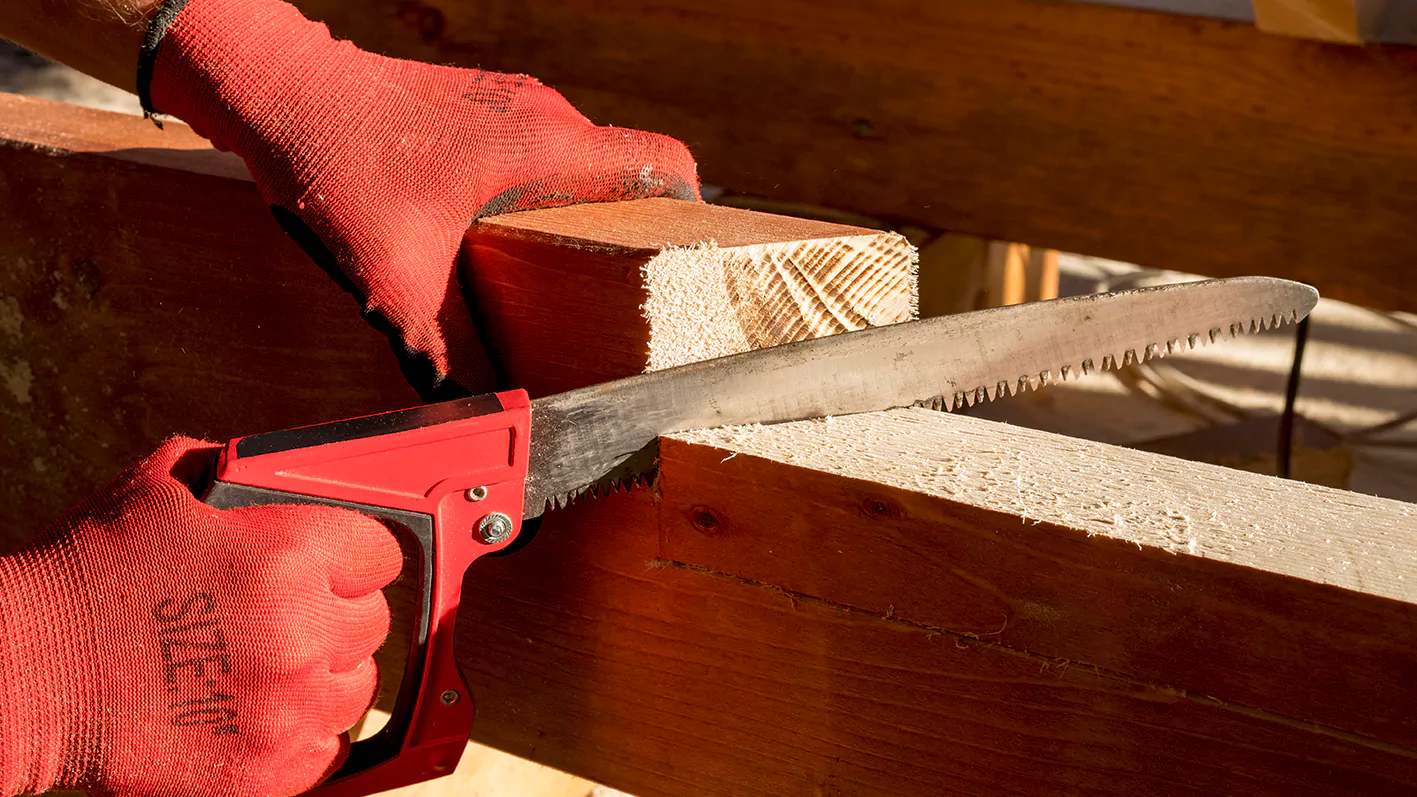
Hand Saws
Saws are a staple among timber frame tools for cutting tenons, beams, and notches.
Japanese vs. Western Saws
Japanese saws cut on the pull stroke and offer cleaner cuts with less effort. Western saws cut on the push stroke and are more familiar to many woodworkers. Both have their place in timber framing.
Best Saw Types for Deep Timber Cuts
For large-scale timber framing, consider a Ryoba (Japanese style) or a Western-style panel saw with coarse teeth and deep gullets for efficient wood removal.
Measuring and Marking Tools
Accuracy is non-negotiable in timber framing.
Squares, Marking Gauges, and Levels
Combination squares, framing squares, and bevel gauges help ensure precise angles. Marking gauges allow repeatable lines, and levels ensure plumb and square alignment.
Accurate Layout Techniques
Use chalk lines and marking knives instead of pencils for crisp, precise lines. Always double-check measurements before cutting.
Must-Have Power Tools for Timber Framing
While traditionalists rely on hand tools, modern timber frame tools include power tools that save time and effort on large-scale projects.
Chain Mortisers
These powerful tools are designed to quickly and accurately cut deep mortises into thick timber.
How a Chain Mortiser Works
A chain mortiser operates like a chainsaw mounted on a guide. It removes material in a controlled rectangular shape, ideal for mortise joints.
Top Chain Mortiser Brands
Makita and Mafell are top-rated brands known for their precision and durability in chain mortisers.
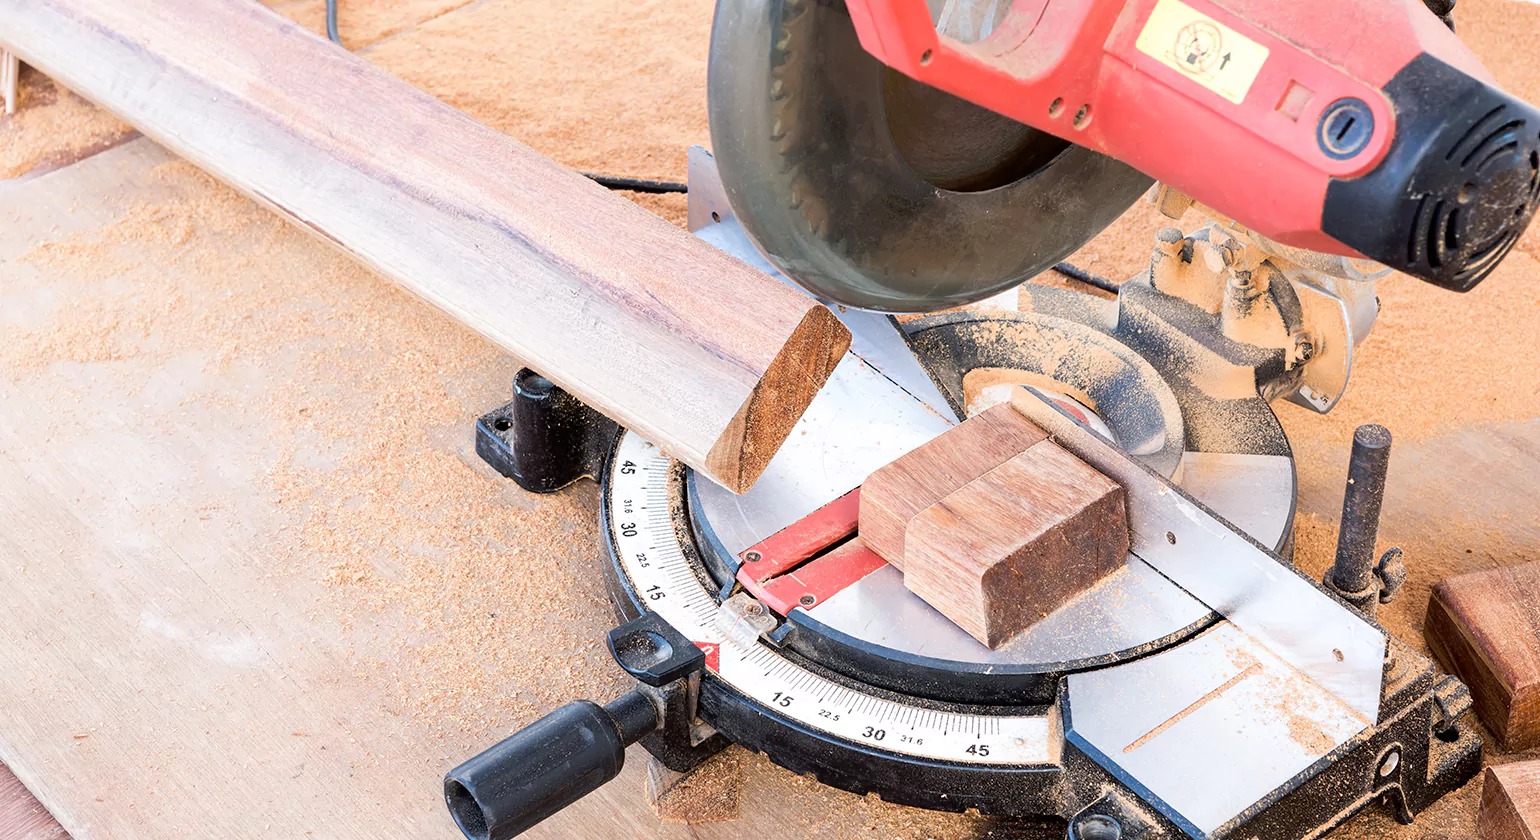
Circular Saws
Circular saws are among the most versatile timber frame tools for straight cuts in thick beams.
Best Circular Saws for Timber Cuts
Look for high-power models with large blade capacities (10 1/4″ or more). Skilsaw and Makita offer heavy-duty saws suitable for timber framing.
Worm Drive vs. Sidewinder
Worm drive saws offer more torque, making them ideal for dense hardwoods. Sidewinders are lighter and better for quick, repetitive cuts.
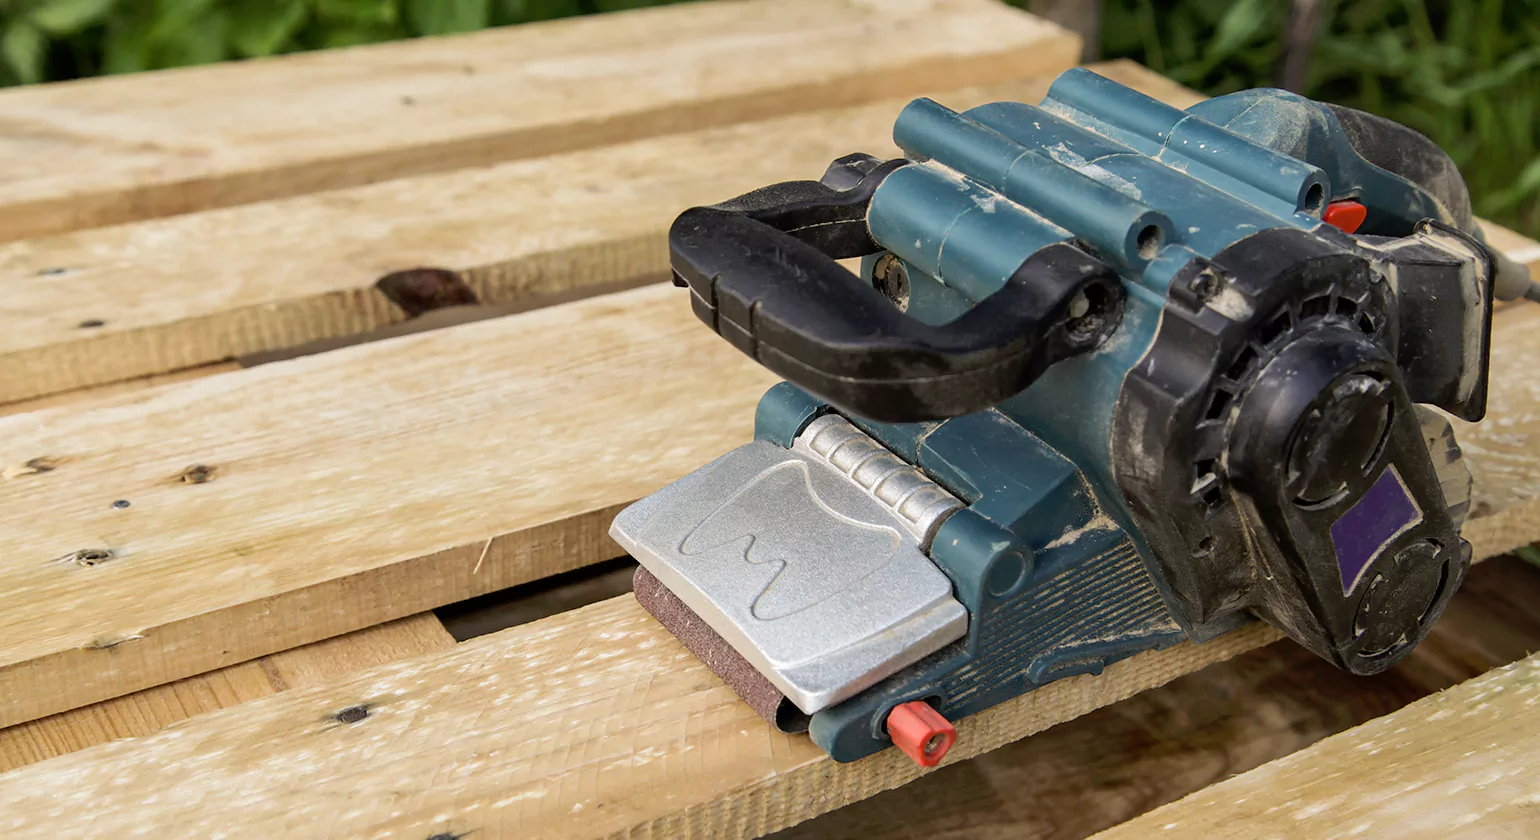
Power Planers
These are used for smoothing and leveling timber surfaces.
Manual Planers vs. Power Planers
Manual planers offer fine control, but power planers are better suited for large surface areas. Festool and DeWalt make excellent models for timber framing applications.
Auger Drills and Drill Presses
Used for boring peg holes and joinery alignment, auger bits and drill presses offer precision and consistency. Cordless models with high torque are ideal for job site work.
Portable Bandsaws
Portable bandsaws can cut curved or irregular shapes and are useful for shaping timber joints or trimming odd angles. Choose a model with a deep throat and durable frame for heavy timber.
Traditional vs. Modern Timber Framing Tools

As timber framing has evolved, so have the tools. Traditional timber frame tools reflect centuries of craftsmanship, while modern power tools bring speed and efficiency. Understanding both approaches helps timber framers choose the right balance for their projects.
Handcrafted vs. Machine-Assisted Joinery
Traditional joinery relies heavily on hand tools such as chisels, slicks, hand saws, and mallets. These tools allow artisans to create intricate joints with precision and care. Handcrafted joinery is favoured for its aesthetic, authenticity, and connection to woodworking heritage.
On the other hand, machine-assisted joinery incorporates modern timber frame tools like chain mortisers, circular saws, and drill presses. These tools speed up production, especially when working with large volumes or under tight timelines. For example, a chain mortiser can complete a mortise in minutes compared to hours of manual labor.
Both styles have their place. Machine-assisted joinery is practical for commercial or large-scale timber frame structures, while hand tools are preferred for custom homes, restorations, and where craftsmanship is key.
Benefits and Drawbacks of Each Approach
Traditional Timber Frame Tools:
Benefits:
- Superior control and detail in joinery
- Minimal noise and dust
- Deeply rewarding craft experience
Drawbacks:
- Time-intensive
- Requires more physical effort
- Steeper learning curve for beginners
Modern Timber Frame Tools:
Benefits:
- Faster production and efficiency
- Greater consistency in repetitive tasks
- Ideal for large-scale or time-sensitive projects
Drawbacks:
- High initial cost
- Requires electricity or battery power
- May reduce the artistic element of handcraftsmanship
Choosing the right approach depends on your project size, budget, skill level, and desired finish. In many cases, blending both traditional and modern timber frame tools delivers the best results.
Top Timber Frame Tool Brands in 2025

When investing in tools, brand reputation matters. The market in 2025 offers a wide range of timber frame tool brands catering to both beginners and seasoned professionals.
Best Value Brands
For those seeking reliable performance without breaking the bank, several brands stand out:
- Narex: Known for affordable yet high-quality chisels and slicks. A top choice for beginner and intermediate timber framers.
- Bahco: Offers excellent hand saws and marking tools at reasonable prices.
- Makita: Widely praised for their power tools, including circular saws and planers, offering a solid balance between price and performance.
- Irwin Tools: Great for budget marking and measuring tools that deliver dependable accuracy.
These brands provide excellent starting points for those building their timber frame tool collection without compromising on quality.
Premium Brands for Professionals
Professionals and experienced timber framers often look for tools that offer durability, accuracy, and performance even under heavy use.
- Barr Tools: Hand-forged chisels and slicks that are known for exceptional craftsmanship and long-lasting sharpness.
- Mafell: A leader in high-performance power tools for timber framing, especially their chain mortisers and saws.
- Festool: Renowned for precision, especially in power planers and dust extraction systems, ideal for shop or site work.
- Veritas: Produces premium measuring, layout, and hand planing tools with unmatched accuracy.
These brands are ideal for professionals who want to make a long-term investment in the best timber frame tools available in 2025.
Starter Tool Kit for Beginner Timber Framers

Starting in timber framing doesn’t mean you need every tool at once. A well-thought-out beginner’s kit can get you up and running without overwhelming your budget or workspace.
Budget-Friendly Recommendations
Here’s a list of affordable, must-have timber frame tools for beginners:
- 1½” Framing Chisel (Narex or Stanley Sweetheart) – Ideal for cutting mortises and refining joints.
- Wooden Mallet – A durable yet gentle striking tool for chisels.
- Hand Saw (Ryoba or Bahco) – For accurate crosscuts and rip cuts.
- Speed Square & Combination Square – Ensures right angles and consistent layout.
- Marking Gauge & Knife – For accurate and repeatable layout lines.
- Basic Power Drill with Auger Bits – For boring peg holes and pilot holes.
These tools help new timber framers learn the craft while maintaining control over the joinery process. Start with manual tools to understand the fundamentals before adding more powerful timber frame tools to your kit.
Prioritizing Tool Purchases
It’s tempting to buy every shiny tool you see, but prioritizing purchases helps build your toolkit sensibly:
- Start with hand tools – Focus on learning skills and techniques with chisels, saws, and layout tools.
- Add essential power tools – Once you’re comfortable, invest in a circular saw or power planer to improve speed.
- Upgrade for specialization – Tools like chain mortisers or bandsaws are expensive but worthwhile for frequent or advanced timber framing projects.
Also, consider buying used tools in good condition or refurbished models from trusted dealers. They offer significant savings while still delivering performance.
Advanced Timber Frame Tools for Expert Builders
As timber framing evolves, so does the demand for more precise and efficient tools. Experienced timber framers often go beyond basic gear and invest in advanced timber frame tools to boost productivity, accuracy, and craftsmanship. These tools are especially valuable for complex joinery, large-scale builds, and high-end custom projects.
Specialized Layout Tools
Accurate layout is the foundation of successful timber framing. While beginner kits include basic squares and gauges, advanced framers turn to high-end layout tools that offer precision to the millimeter.
Key specialized layout tools include:
- Large Beam Squares: Ideal for laying out joinery on wide timbers.
- Scribing Tools: Used for transferring contours from one timber to another—critical in curved or compound joinery.
- Laser Measuring Devices: Provide quick, accurate distance measurements and level alignment for large frames.
- Digital Angle Finders: Helpful for measuring non-standard angles in roof pitches or complex trusses.
These advanced timber frame tools reduce human error and help streamline the process of transferring detailed designs to the material.
CNC and Digital Tools in Timber Framing
CNC (Computer Numerical Control) machines and digital fabrication tools are transforming how timber frames are built. Once exclusive to large manufacturing operations, these technologies are becoming more accessible for small timber framing shops and professional builders.
CNC routers and beam processing centers allow users to:
- Program precise cuts and joinery patterns
- Reduce waste and optimize timber use
- Minimize manual labor while maintaining accuracy
3D modeling software such as SketchUp or CAD systems is also an essential part of the modern toolkit. These digital timber frame tools enable framers to simulate joinery, adjust dimensions, and share plans seamlessly with clients or team members.
How to Maintain and Sharpen Timber Framing Tools
Even the best timber frame tools need regular care to remain effective and safe. Proper maintenance extends tool life, ensures accuracy, and enhances your woodworking experience.
Cleaning and Rust Prevention
Woodworking environments often involve dust and moisture—both enemies of steel tools. After each use:
- Wipe blades and metal surfaces with a clean, dry cloth
- Apply a light coat of camellia oil or WD-40 to prevent rust
- Use silica gel packs in storage areas to absorb moisture
Remove resin and wood buildup from power tool blades with a specialized cleaner or a mixture of water and baking soda. For stubborn rust spots, use fine steel wool or a rust eraser.
Sharpening Techniques for Chisels, Saws & Blades
A sharp tool is a safe tool. Dull chisels or saws require more force, increasing the risk of slipping or injury. Keep your timber frame tools razor-sharp with the following techniques:
- Chisels & Slicks: Use a flat sharpening stone (preferably diamond or water stones). Maintain the correct bevel angle (usually 25°–30°). Finish with a strop to polish the edge.
- Hand Saws: Use a triangular file to sharpen each tooth. Set the teeth with a saw set tool to maintain the correct kerf.
- Circular Saw Blades: Remove and sharpen using a professional sharpening service or replace the blade if it’s beyond repair.
Investing in a sharpening system or guided honing tools can greatly improve your edge maintenance, especially for beginners learning to care for high-end timber frame tools.
Safe Tool Storage Ideas
Proper storage prevents damage, extends lifespan, and keeps your workshop organized.
Storage solutions include:
- Tool rolls and canvas wraps for chisels and slicks
- Wall-mounted racks for handsaws and levels
- Foam-lined drawers for delicate layout tools
- Weatherproof toolboxes for on-site work
- Magnetic strips or shadow boards for quick access to frequently used tools
Avoid throwing tools into bins or drawers where they can bang against each other. Always dry tools before storing and regularly inspect them for wear or damage.
Where to Buy Timber Framing Tools
Finding quality timber frame tools means knowing where to shop. Whether you’re a first-time buyer or a seasoned pro, purchasing from reputable sources ensures you get authentic, long-lasting tools.
Online Tool Stores
Online stores offer a wide selection of timber framing tools with customer reviews, competitive pricing, and convenient delivery.
Top online retailers include:
- Hardwick & Sons – Specializes in traditional hand tools, including slicks and framing chisels
- TimberTools.com – A go-to for professional-grade timber frame tools and accessories
- Woodcraft – Carries a variety of hand and power tools for both novice and expert builders
- Amazon – Offers access to a wide brand selection, often with fast shipping and buyer protection
When buying online, check for authenticity, warranty, and return policies. Stick with trusted brands and read user reviews before purchasing.
Local Woodworking Shops
If you prefer to see and feel tools before you buy, local woodworking or specialty tool shops can be invaluable. These stores often offer:
- Hands-on product demos
- Expert guidance
- Sharpening and repair services
- Workshops or training events
Supporting local businesses also helps build relationships in the woodworking community and can lead to better deals or personalized recommendations.
Buying New vs. Used Tools
Budget-conscious timber framers often debate between buying new or used timber frame tools. Both options have pros and cons.
Buying New:
- Latest features and improved materials
- Manufacturer warranties
- No wear and tear
- Higher upfront cost
Buying Used:
- Lower price
- High-quality vintage tools often outperform modern ones
- May require refurbishment or sharpening
If buying used, inspect tools for cracks, pitting, missing parts, or excessive wear. Auction sites, estate sales, and online forums like Forestry Forum or Reddit’s woodworking groups can be great places to find deals.
Timber Framing Tool Safety Tips

Working with timber frame tools involves sharp edges, powerful motors, and heavy materials. Whether you’re a seasoned builder or a DIY enthusiast, following safety guidelines is essential to avoid injury, protect your equipment, and ensure the success of your project. This section outlines essential safety measures for the workshop, personal protection equipment (PPE), and specific advice for handling various tools.
Workshop Safety Rules
Creating a safe work environment is the first step in avoiding accidents. Timber framing involves large-scale materials and tools that demand proper setup and awareness.
Key workshop safety rules include:
- Maintain a clean, organized workspace: Loose offcuts, cords, and tools scattered across the floor are trip hazards.
- Use proper lighting: Ensure your cutting, layout, and joinery stations are well-lit to reduce error and eye strain.
- Secure timbers before cutting or chiseling: Use clamps or sawhorses to prevent shifting during operations.
- Never work when tired or distracted: Timber frame tools require your full focus—errors can lead to serious injury.
Follow safety signage protocols, label tool drawers, and conduct regular checks on your workspace to maintain a professional, hazard-free zone.
Using PPE for Timber Framing
Personal protective equipment (PPE) is non-negotiable when handling timber frame tools, especially power equipment.
Recommended PPE includes:
- Safety glasses or goggles: Protect your eyes from sawdust, wood chips, and flying debris.
- Hearing protection: Use earmuffs or earplugs when operating loud power tools like circular saws or chain mortisers.
- Dust masks or respirators: Especially when cutting or sanding wood that may release fine dust or contain chemical treatments.
- Gloves: Wear cut-resistant gloves when handling rough-sawn timber but avoid wearing them near rotating machinery.
- Steel-toed boots: Offer protection from dropped tools or heavy timbers.
Wearing the appropriate gear reduces the risk of injuries and allows you to work with greater confidence and control.
Tool-Specific Safety Advice
Each category of timber frame tools carries unique risks. Understanding how to use them properly is key to avoiding accidents.
Framing Chisels and Slicks:
- Always cut away from your body.
- Keep blades razor-sharp to reduce slippage.
- Use a proper mallet (never a metal hammer) to avoid splitting the handle.
Hand Saws:
- Maintain a firm grip with both hands.
- Clamp the timber securely to avoid movement.
- Keep the saw teeth sharp and clean to reduce binding.
Circular Saws and Chain Mortisers:
- Check the blade alignment and guard before each use.
- Use both hands to control the tool.
- Let the blade come to a full stop before setting the tool down.
Auger Drills and Bandsaws:
- Keep fingers clear of the cutting path.
- Use guides and clamps to steady your material.
- Avoid wearing loose clothing that could catch in the blade or bit.
Taking these precautions will keep your timber frame tools in top shape and help prevent injury.
Timber Frame Tools Checklist

Whether you’re starting your first timber framing project or upgrading your pro-level shop, having a structured checklist ensures you don’t overlook essential tools. A well-organized timber frame tools checklist also makes planning and budgeting easier, allowing you to prioritize based on project complexity and skill level.
Printable Tool List for All Skill Levels
Here’s a comprehensive checklist categorized by beginner, intermediate, and advanced levels. Feel free to print and use this as a reference when setting up your timber framing workshop.
Beginner Timber Frame Tools:
- 1½” Framing Chisel
- Wooden Mallet
- Ryoba or Bahco Hand Saw
- Speed Square
- Combination Square
- Marking Gauge
- Layout Pencil or Knife
- Hand Drill with Auger Bits
Intermediate Tools:
- Slick (2–3” width)
- Circular Saw (Worm Drive or Sidewinder)
- Power Planer
- Spirit Level
- Bevel Gauge
- Sawhorses or Timber Workbench
- Tool Roll for Storage
Advanced Tools:
- Chain Mortiser (Makita, Mafell)
- CNC Router or Beam Processing Machine
- Portable Bandsaw
- Digital Angle Finder
- Laser Level or Measuring Device
- Dust Collection System
- High-End Layout Tools (Scribing Compass, Beam Square)
This tiered system lets you build your toolkit in phases, depending on your current needs and budget.
Customize Your Checklist by Project
Every timber framing project is different, and your tool selection should reflect that. Use this customizable format to tailor your list:
- Small Garden Shed or Outbuilding
- Hand tools
- Circular saw
- Manual mortising chisel set
- Marking and layout tools
- Timber Frame Pavilion or Gazebo
- Add power planer
- Heavy-duty clamps
- Auger bit set with drill press
- Intermediate layout tools
- Full Timber Frame Home
- Full array of timber frame tools
- Chain mortiser
- Professional sharpening kit
- CNC-compatible layout software and hardware
Matching your tools to the project ensures optimal results without overextending your resources.
Conclusion
In conclusion, mastering timber framing begins with investing in the right timber frame tools, prioritizing safety, and continuously honing your craft. From traditional hand tools to modern power and CNC equipment, each tool serves a specific purpose in achieving structural precision and aesthetic excellence. By following proper safety protocols, maintaining and sharpening your tools, and using a strategic checklist tailored to your skill level and project needs, you can ensure both quality results and long-term success. Whether you’re a beginner or an expert builder, the right tools and practices are the foundation of every strong timber frame.
Know More>>> Modern Timber Frame Home: Strength and Style Combined
FAQ’S
How do you sharpen a timber framing chisel?
To sharpen a timber framing chisel, begin by flattening the back on a coarse sharpening stone, then progress to finer grits for a polished finish. Use a honing guide to maintain the correct bevel angle (typically 25° to 30°). Finish with a strop for razor-sharp results. Regular sharpening ensures cleaner cuts and safer use of your timber frame tools.
Are Japanese saws good for timber framing?
Yes, Japanese saws—especially Ryoba and Kataba types—are excellent for timber framing due to their pull-stroke design, which offers greater control and cleaner cuts. They are ideal for precise joinery in hardwoods, although Western saws may be preferred for deeper, faster cuts in large timbers. Many expert framers include both styles in their timber frame tools arsenal.
What’s the difference between a slick and a chisel?
While both are essential timber frame tools, a chisel is designed for striking with a mallet to cut joints, whereas a slick is a larger, thinner tool used for fine paring and smoothing. Slicks are operated with hand pressure, not force, making them ideal for finishing joints with precision after rough shaping is complete.
Where can I buy high-quality used timber framing tools?
You can find high-quality used timber frame tools through specialty woodworking forums like Forestry Forum or Timber Framers Guild classifieds, as well as marketplaces like eBay, Craigslist, and Facebook Marketplace. Local tool auctions, estate sales, and antique tool dealers may also offer well-preserved vintage tools that outperform many modern alternatives.
How do you store timber tools to prevent rust?
To prevent rust, store your timber frame tools in a dry environment using tool rolls, wall racks, or foam-lined drawers. Wipe down blades with a light coating of camellia oil or WD-40 after use, and use silica gel packs to absorb moisture in drawers or toolboxes. Avoid leaving tools in uninsulated garages or damp basements.